How to Password Protect a Directory
If you have a Web Hosting with Crazy Domains, you can store sensitive material online and simply limit access to the said files to only authorised users. You can do this by setting passwords to directories within your site. This can be implemented with the Directory Privacy feature within your Hosting Manager.
How to Access Directory Privacy
Make sure to Sign Up and register for a Hosting account with us then follow the steps below to access Directory Privacy via Hosting Manager.
Step 1. Log in to your cPanel.
Step 2. Scroll down to the the Files tab, then click the Directory Privacy option.

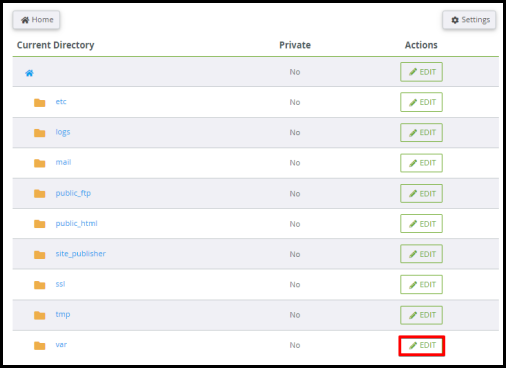
Step 3. In the next page, you will see all the directories in your web server. Click on the corresponding action below to:
- Setting up Password Protect a Directory
- Creating Authorised User
- Updating Authorised User’s password
- Deleting Authorised User
Setting Up Password Protect a Directory
After accessing your Directory Privacy you can follow the steps below to set up a password to a directory that can also be found in your File Manager.
Step 1. Select the one you want to put a password on and click the corresponding Edit button to the right.
Step 2. On the Directory Privacy page, click the checkbox for Password protect this directory option and enter the name of the directory. You can use the actual directory name or create an alias.
Step 3. Click the Save button.
A confirmation message will appear that permission is set to the directory. Click the Go Back button to return to the Directory Privacy page. The next step is to create an authorised user.
Creating Authorised User
If a user tries to access a directory that privacy is set. Only an authorised user can get access to the directory. It will prompt to enter their username and password to get access to the directory. To create an authorised user for a directory, follow the steps below.
Step 1. Access the Directory Privacy page.
Step 2. Select the directory you wish to manage.
Step 3. Scroll down to Create a User section of the page, and provide information to the following:

| Username | This is the Authorised User’s name. |
|---|---|
| New Password | This is the key that will enable you to access the password protected folder. Itis recommended that you use uppercase and lowercase letters, numbers, and symbols to create a strong password. The system will tell you how weak or strong your password is when you type it in the appropriate fields. If you find it difficult to make a strong enough password for your email, you can let the system create one for you. Click the Password Generator button. In the pop-up box, copy the generated password and paste that in the Password fields. You can also choose to check I have copied this password in a safe place. Then, click Use Password. This will automatically copy and paste the generated password in the Password fields. Important Note: Make sure you have actually saved the generated password in a safe and easy to recall place.
|
| Password (Again) | This is only for confirmation and should be the same as the New Password. |
Step 4. Click the Save button.
A confirmation message will appear that an authorised user is added. Click the Go Back button to return to the Directory Privacy page.
You can add an Authorised User in any directory even if the password protect feature is not enabled. However, the user will not have to log in with the username and password unless the password protection is enabled.
If a directory is password protected, it should have at least one Authorised User, otherwise, no one will be able to view the directory.
Updating Authorised User’s Password
To change the password of an Authorised User, follow the steps below.
Step 1. Fill out the Create User fields with the current username and the new password.
Step 2. Click the Save button to implement the changes.
A confirmation message will appear that the new password is set to the specified user from the directory. Click the Go Back button to return to the Directory Privacy page.
Deleting an Authorised User
To remove an Authorised User, follow the steps below.
Step 1. Select the user you want to delete under Authorised Users.
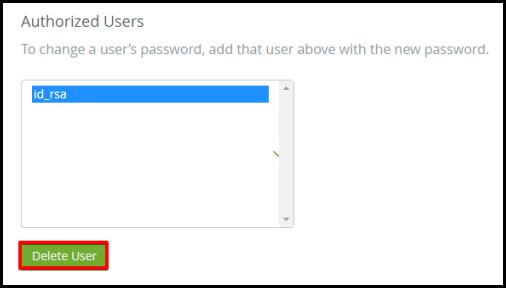
Step 2. Click the Delete User button.
A confirmation message will appear that the authorised user is deleted from the directory. Click the Go Back button to return to the Directory Privacy page.
If you have any questions or need further assistance, please don’t hesitate to contact us here.